| David L O Smith - Home |
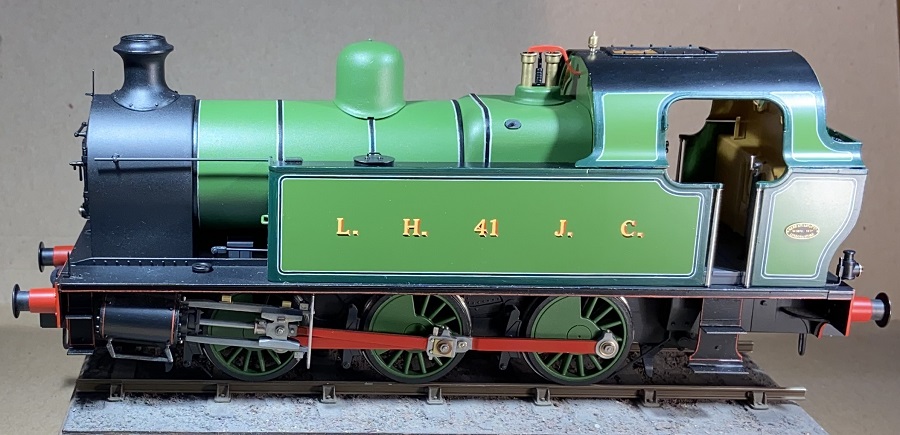
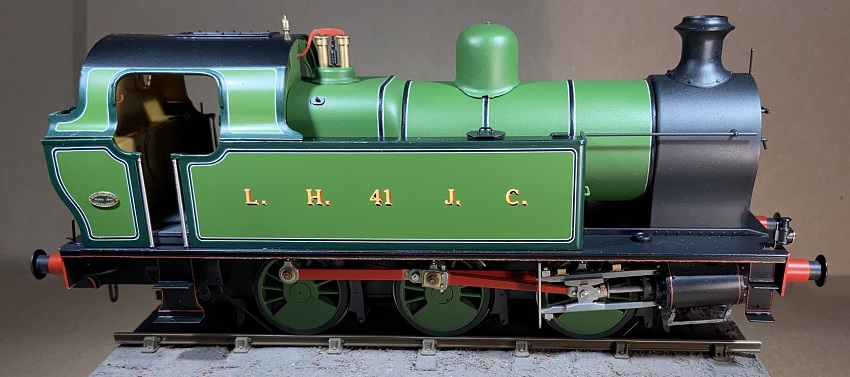
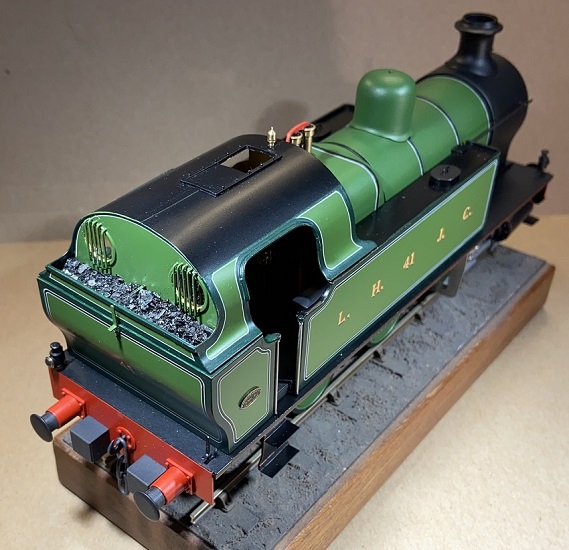
Kerr Stuart 'Victory' ClassLambton Hetton & Joicey Colliery Railway No.41 |
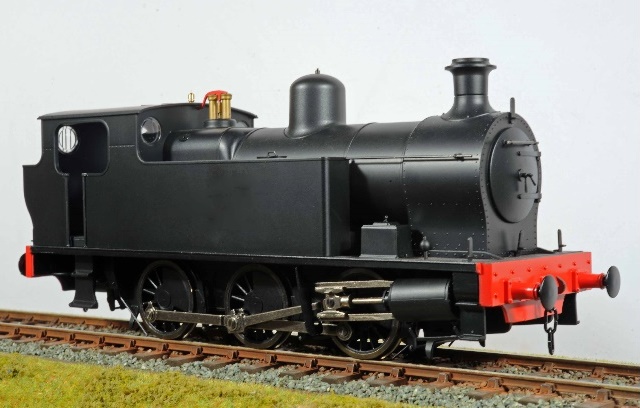
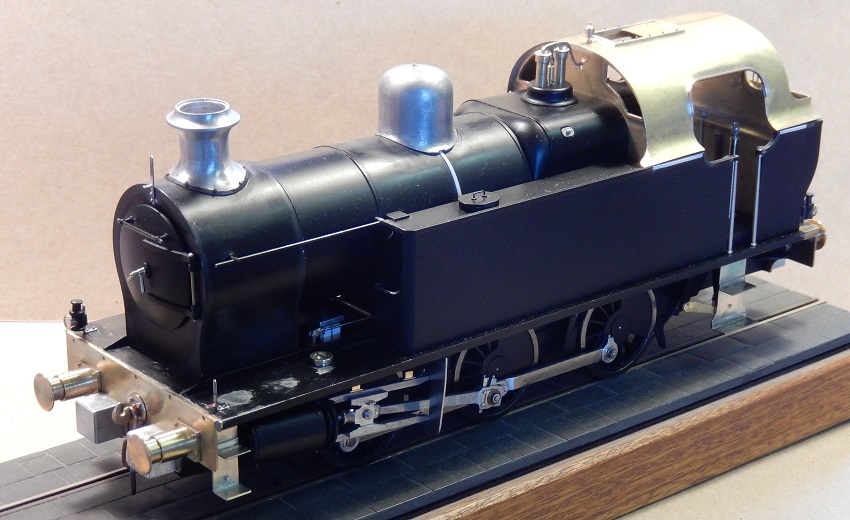
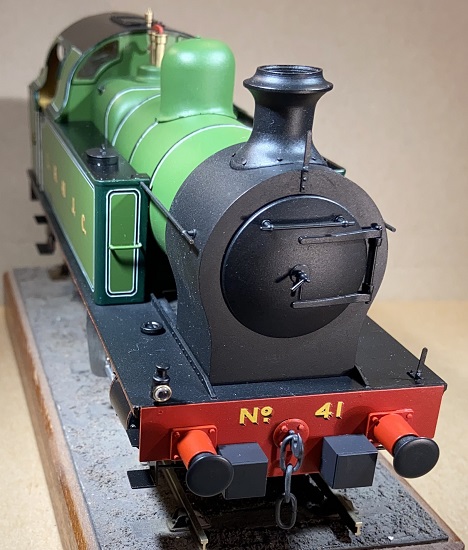
'Victory' class RTR model as supplied by Minerva Model Railways
Although No. 41 no longer exists, the cab of No. 29, an 0-6-2T built by Kitson and Company of Leeds in 1904, was similarly profiled and it is preserved on the North Yorkshire Moors Railway.
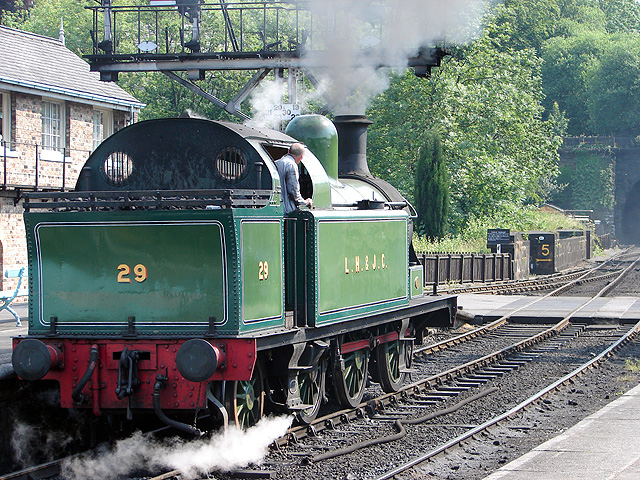
No. 29 on the North Yorkshire Moors Railway
(Source:
Wikipedia)
| As one of the last two of the Victory class to be built, No. 41 did not have the thick wooden buffer planks in front of the steel ones like the others in the class and as modelled by Minerva Model Railways. It seemed to me to be more psychologically sound to make the replacement buffer beams before I set to with the miller to remove the perfectly good ones. |
 |
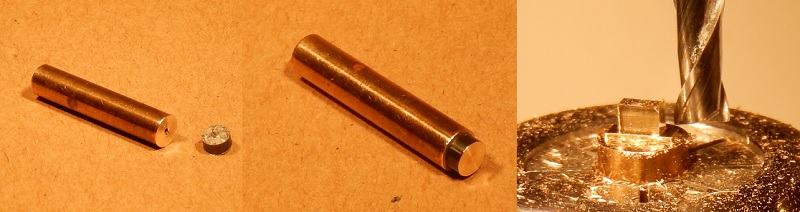
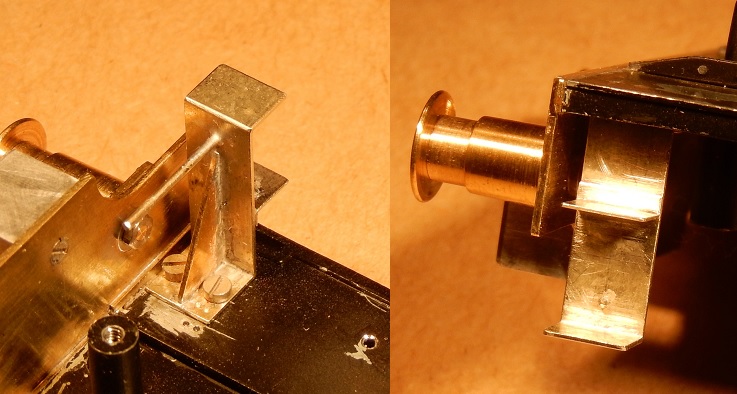
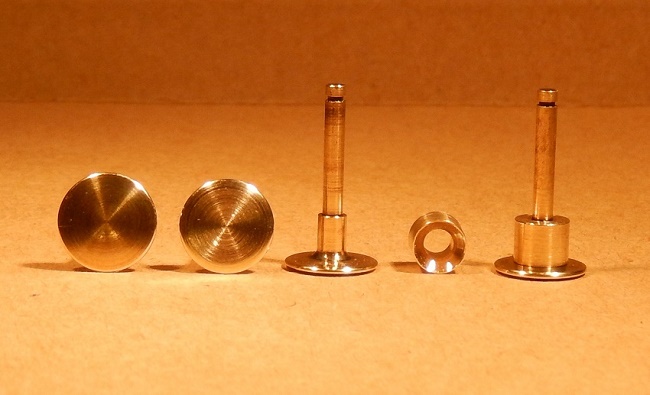 Head reduced in diameter (above left) and diameter of shank increased with collar (right) |
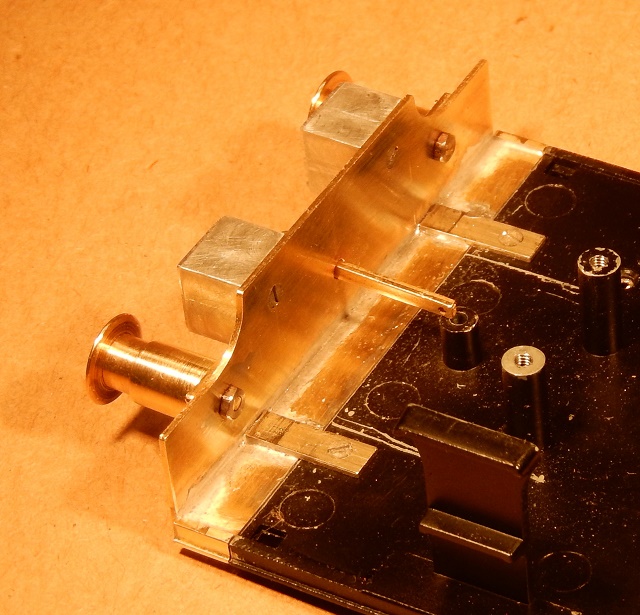
I was able to reuse the buffer heads and shanks (I slightly reduced the diameter of the former and made some collars to increase their diameter of the latter) but I made new buffer stocks, drawplates and I reworked the coupling with more accurate hooks and links. |
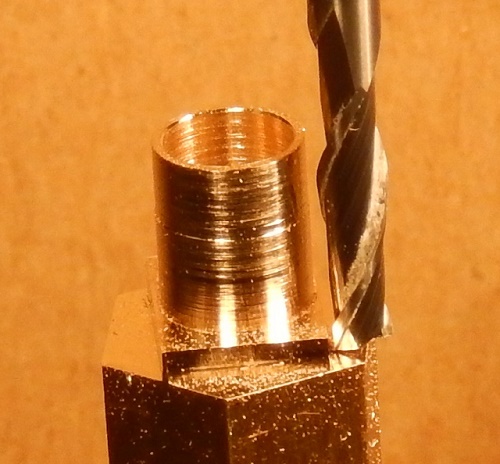 An embryo buffer shank appearing from a piece of hex brass bar (because I have many such off-cuts) |
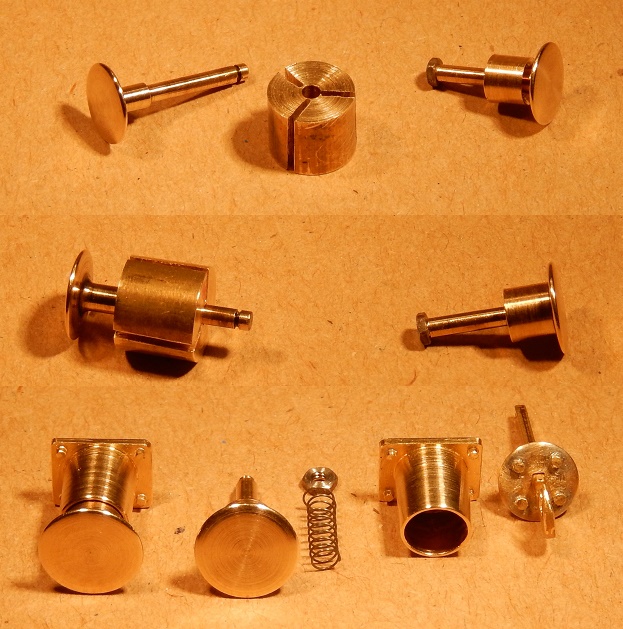 Holding the buffer shanks using a bespoke split collet to reduce their length (upper and middle), the finished buffer and component parts along with a new drawplate and draw hook (lower) |
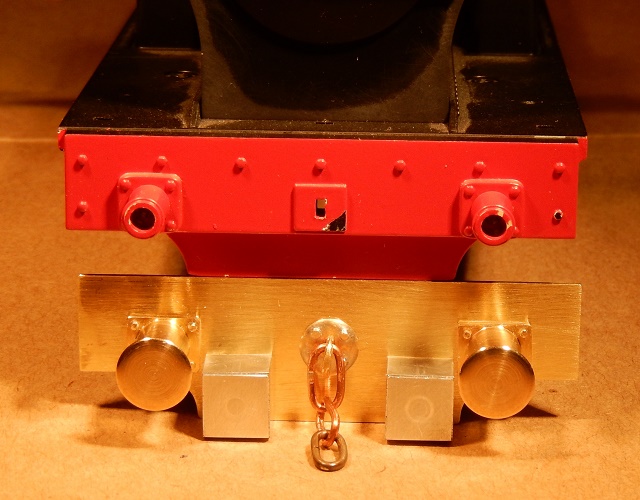
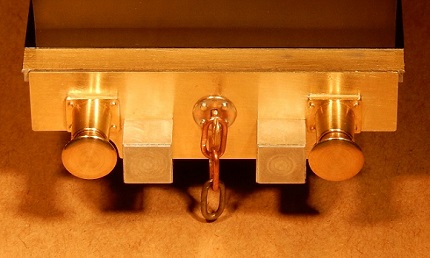
| I milled the dumb buffers from aluminium and used 12BA screws to fasten them from behind the buffer plank. |
 Milling a representation of the steel plate that faces the dumb buffer |
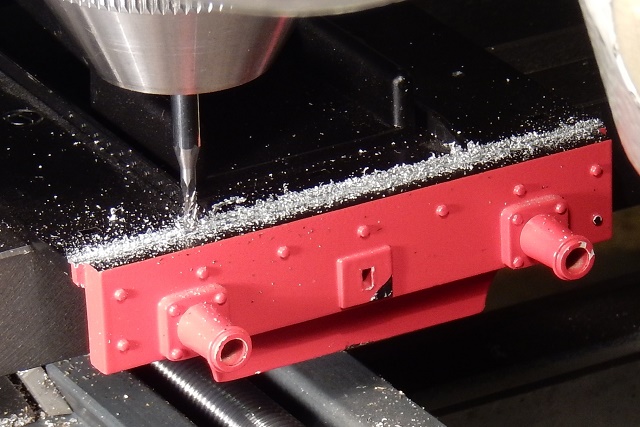 |
With this all at hand, for a second time I milled off perfectly good representations of buffer planks and buffers (for the first time see: GCR Humber). |
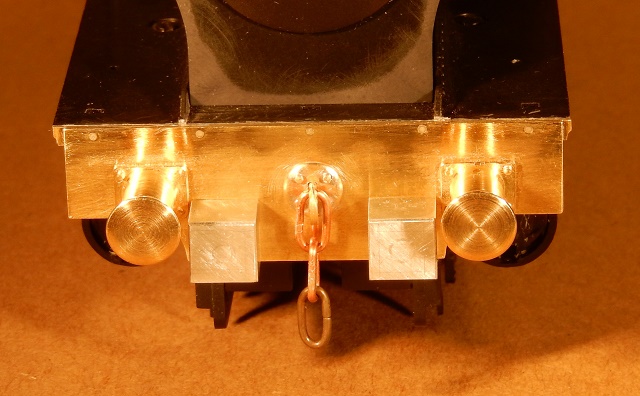
| I attached the new front buffer plank with steel pins and epoxy resin to the machined end of the diecast running plate. |
 |
 |
To allow for the thinner buffer plank, the running plate is extended under the bunker at the rear. I represented this by laminating some waste etches, as I had no suitable brass stock of the correct thickness, and I milled the edges to match the existing running plate. I then soldered the new rear buffer plank to the extension piece and screwed and glued the assembly to the running plate. |
 |
 |
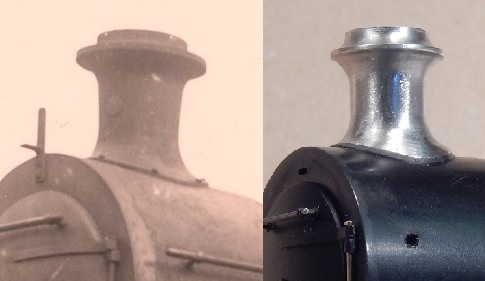
| The chimney is a rather prominent feature of a steam loco so, as it contributes greatly to its ‘character’, I set about modifying the existing chimney (near right). The upper part is a brass turning and is easily removed with a twist and a pull, whereas the lower part (the flared base) is moulded integrally with the smokebox. The several photographs that I had of this LH&JC loco all showed a chimney with a quite different profile (far right) but with a secondary flange between the flare and the smokebox. |
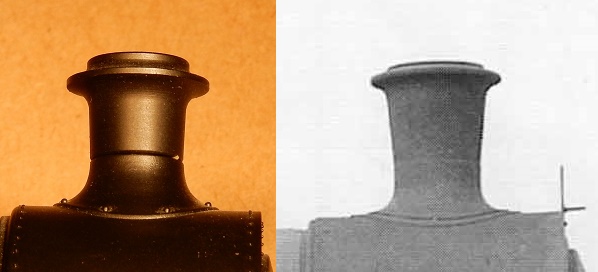 Chimneys: model (left) and No. 41 (right) |
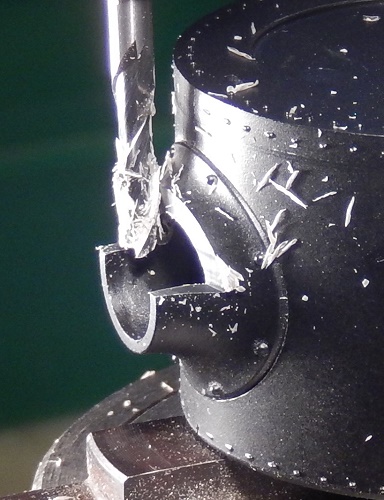 |
I reckoned that, by removing most of the flare on the model, what remained would represent the flange. I set up the smokebox moulding in a chuck on the rotary table and, in the time honoured fashion of twiddling the right handles in the right order by the right amount, I milled away all but about 0.5mm of the lower part of the chimney. |
| I could have machined a replacement chimney but making the flare
requires a fair amount of tedious work with a file (I do know, I have
done it) so I decided to use the flare from a white metal chimney
casting that I had to hand and to turn an upper part to fit it. Less than twenty four hours after I had reached this point, a friend emailed me an image of No. 41 in its original LH&JC livery, just as I wished to model it. Yes, this is what good friends are for: the image clearly showed that, at the time, No. 41 still had its more elegant Kerr Stuart chimney. |
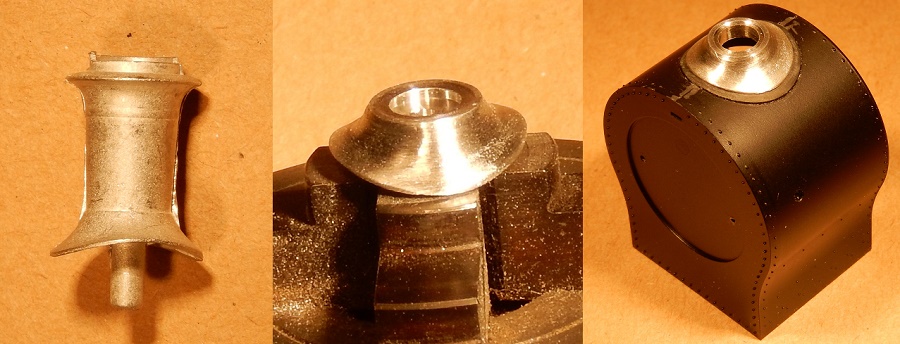 |
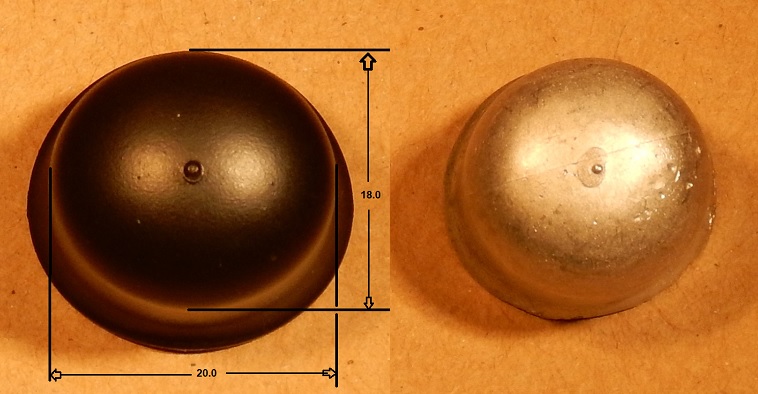 Oval plastic dome (left) and replacement circular white metal casing (right) |
I visited my good friend a few days later so I was able to thank him for the image that he had sent and to explain what I’d done. Now this was what good friends are for: he gave me a replacement white metal casting for the chimney and also one for the dome, which very neatly solved another problem that I had spotted early on. The plastic dome on the model (far left) is perfectly formed and clips very neatly into the boiler to give a very good representation of a sheet metal dome sitting on sheet metal boiler cladding. The problem is that, although perfectly formed, the main body is far from circular; it is 18.0mm front to back (as it should be) but 20.0mm from side to side, which is rather noticeable (anybody else noticed this?). My friend’s donated white metal casting (near left) needed a bit of filling with low melt solder and a bit of fettling but it is very nearly a uniform 18.0 mm in diameter. |
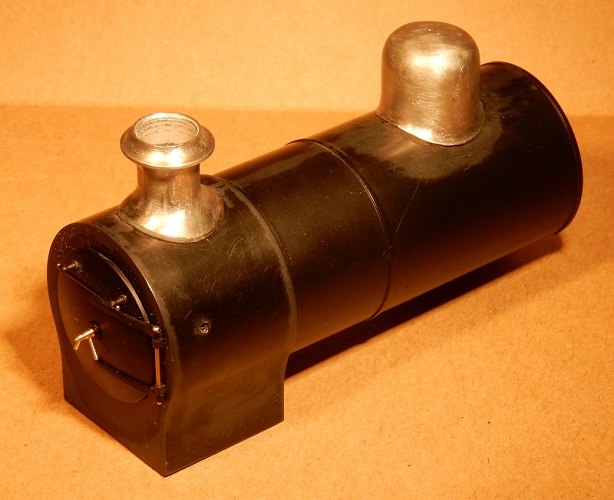
| Although the replacement chimney is a fair representation of that of the prototype, I must concede that it is not as faithful as the original integral moulding and brass turning but I did not consider it worth altering and/or adapting its base to take the brass turning. |
 Chimneys: prototype (left) and model (right) |
 |
I blanked off the hole left by the dome with 0.5mm plastic card and I screwed both castings in place with nuts on studs that I soldered into the castings. I used epoxy resin to blend in the flare of the chimney casting with the integral flange and then cleaned it up. |
| As the with the buffer planks, the smokebox on No. 41 was fabricated with flush rivets so I sanded off the nice representations of snap head that were moulded on the model. I moved the door hinges (smokebox parts between the door parts) and made up a headed nickel silver hinge pin to replace the integral moulding. I made the door handle/darts as three simple turnings and soldered them together into an assembly that fits in the central hole in the door. |
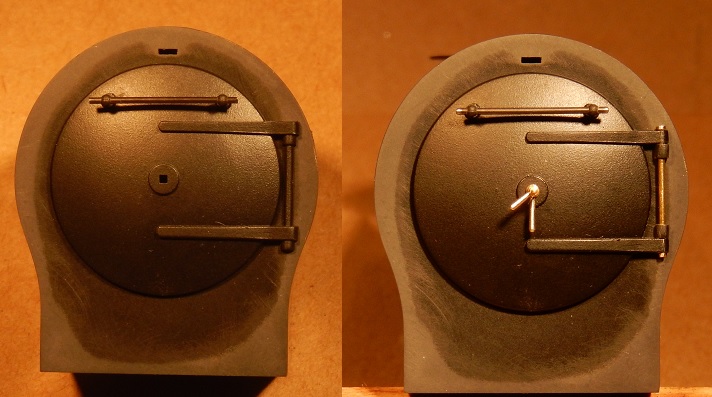 Smokebox door before (left) and after (right) |
 Original plastic mouldings (left), jig for assembling the replacements (centre) and the final replacement assembly (right) |
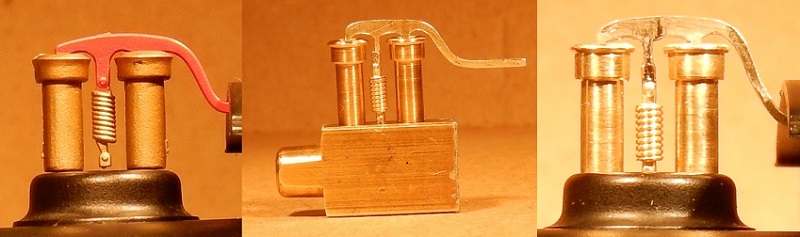
| The safety valves are well depicted in a plastic moulding but I
decided to make up new ones in brass. I should make it clear at this
point that this replacement is not intended as a criticism of this
excellent RTR model but is merely my choice; there is a great deal of
difference between what may be tackled in a modeller's workshop and what
may be achieved at a very reasonable price on a production run. The valve casings are simple turnings, a turned down 12BA thread represents a square-section spring and I filed the handle from a piece of nickel silver. To solder the four components together, I assembled them in a little jig that held the two casings and the spring at the correct distances to fit in the holes that I had drilled in the safety valve cover. |
 |
In reality, the safety valves do not sit on top of the cover on the firebox, the cover fits over them; I milled a slot in the cover to represent this so that the valves appear to be coming through the cover rather than sitting on top of it. |
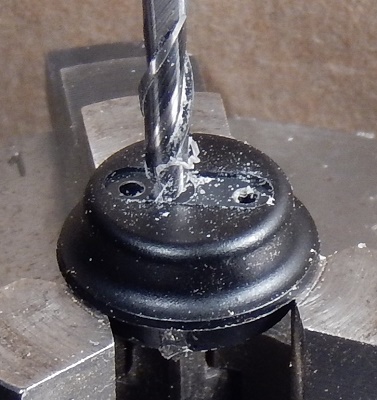
| The cylinder covers on the prototype are retained by twelve rather prominent bolts or screws whereas the covers on the model are provided with eighteen small representations, which I removed and replaced with inserts of styrene rod. |
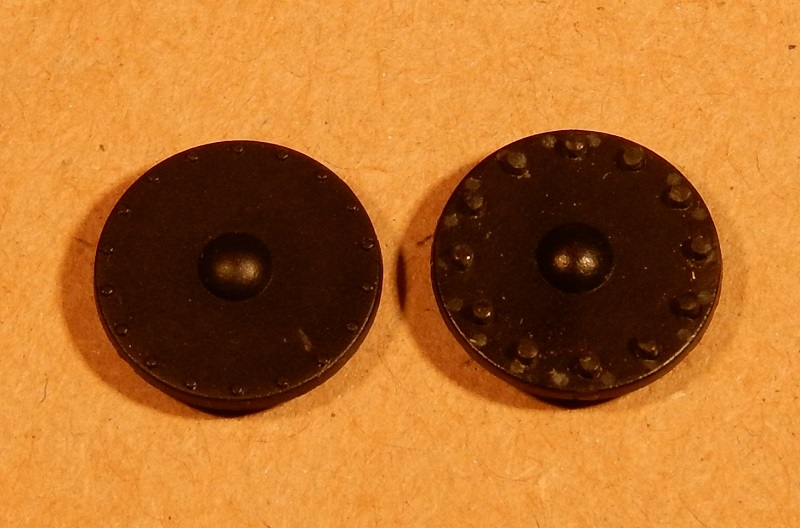 Cylinder cover before (left) and after (right) |
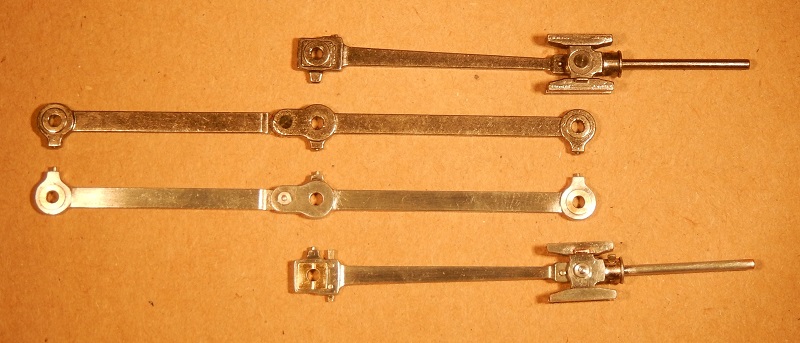 Coupling rods and conrods before (above) and after fettling and with additions (below) |
The diecast rods on the model are finished in shiny nickel plating
and they do benefit from a bit of fettling with a file to remove
moulding lines and the draft. In doing this, I removed the nickel and
underlying copper plating to reveal the base metal, which looks rather
more like steel than the nickel plating. I took the opportunity to add ‘brasses’, a cotter and retaining screws (on the big end), a cotter on the crosshead (to retain the piston rod) and to replace the gudgeon pin and knuckle joint pin with something a little more realistic. |
| The slidebars are similarly finished in shiny nickel and they also
benefit from cleaning up by draw filing. The prototype has two oil pots
on the upper slide bar and both slide bars are attached to the motion
bracket with a bolts through a rectangular block. These small component
are easily machined … if you can just get hold of them. I used the
convenient expedient of a solder chuck: solder the blank to a mandrel,
machine the component, unsolder it from the mandrel. The motion plates are painted black but are etched from nickel silver so I stripped them of paint, tinned them all over and then stroked them with a Garryflex abrasive block to represent steel. |
 Machining an oil pot. The mandrel with a hole and a turned blank with a spigot (left), the blank soldered to the mandrel (centre) and machining the blank (right) |
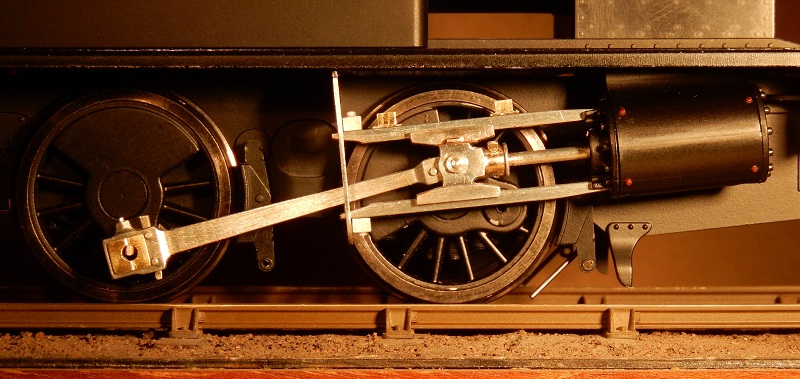
Reworked conrod, crosshead, slidebars and cylinder
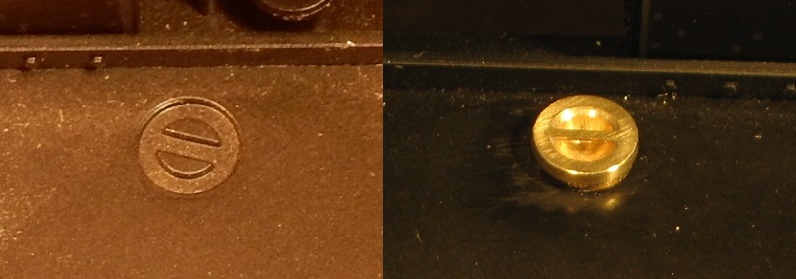 Half relief sandbox lid (left) and machined replacement (right) |
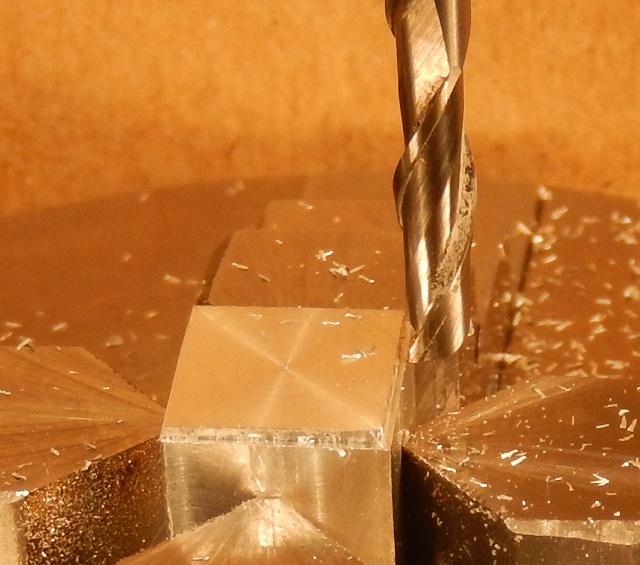
The fillers for the sand boxes have the traditional lids with a handle above a recess and this is represented in half relief in the die cast footplate but it seems to be reversed from what would be expected (ie the surround and handle are depressions and the recess is two raised nearly semi-circles). I decided to machine away these impressions with a 3/16” slot drill and to make replacements that projected slightly above the footplate, as they appeared in my photograph. |
| The process was quite simple, if a bit delicate. First, I turned a piece of stock brass to diameter and made the depression with a ball nose slot drill. I then transferred the job to the milling machine and milled two short slots (0.5mm wide, 0.25mm deep) in the rim, working outwards from the depression, to accept the handle. I made the handle from a short length of 0.5mm diameter brass wire, which I soldered into the two shallow slots. As half the diameter is above the original turning, I had only to return the job to the lathe and very carefully, with light cuts and a slow feed, remove half the diameter of the wire to leave a semi-circular (half-round) handle. |
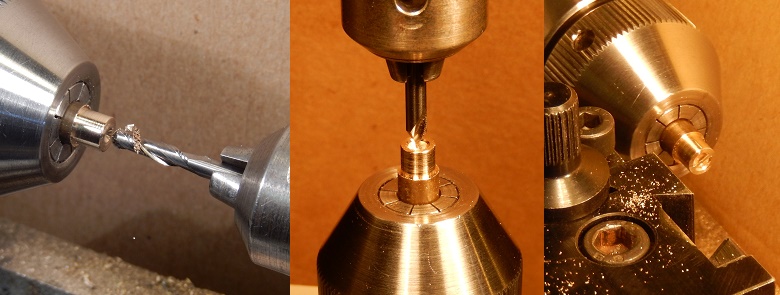 Partway through machining the depression (left), milling the shallow slots to accept the wire handle (centre) and machining away the outer half of the wire (right) |
Having cut off the representation of the buffer planks, the frame overlays need to be extended by the equivalent amount at the rear with a simple cut-and-shut. At the same time, I took the opportunity to add some detail to the steam brake on one side and to make a more realistic representation of the hand brake operating crank and spindle to replace the plastic component that was a bit distorted.
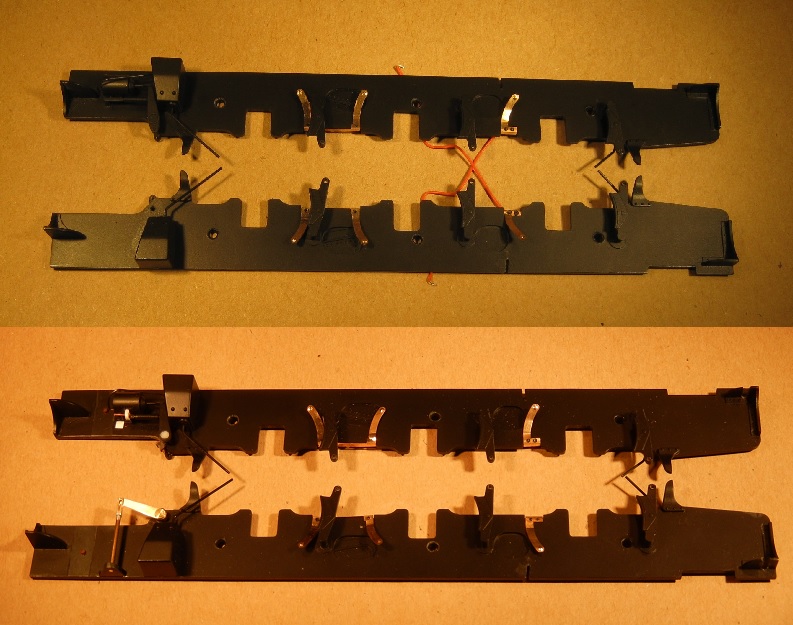
Frames before (above) and after extension
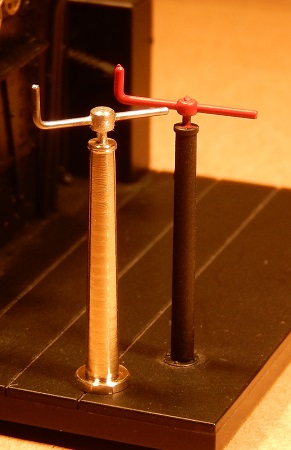 Replacement brake standard (left) |
The plastic brake standard appeared a bit 'undernourished' so I made a replacement in brass and fitted it with a steel handle. |
| Next to be addressed were the steps, which required a bit of alteration to represent plain steps without the later additions of turn-ups to the treads. |
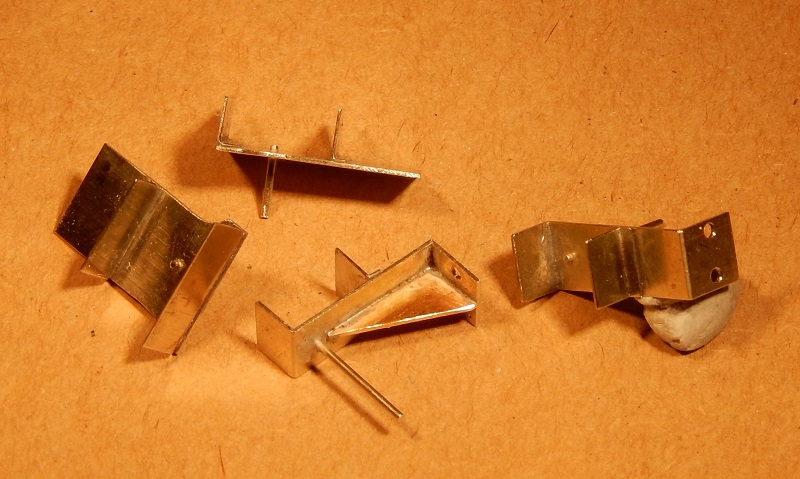 Replacement nickel silver rear (left) and front step assemblies |
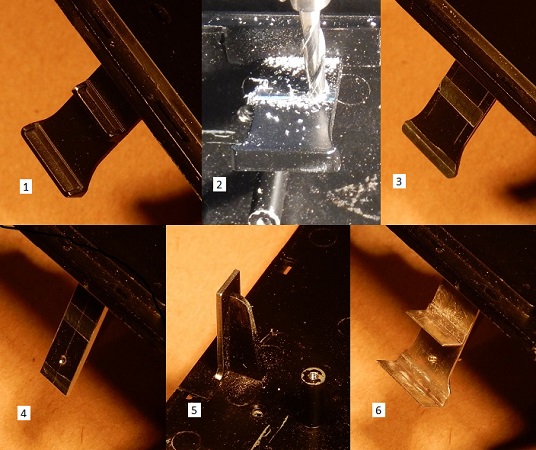 1) Original step 2) Milling away treads 3) Treads removed 4) Front of remaining stub 5) Rear of remaining stub 6) Replacement nickel silver step assembly superimposed on stub |
The rear steps are cast integrally with the running plate but I decided that it would be easiest to mill away most of the existing steps, leaving just a stub as a sturdy support, and to fit a new nickel silver step assembly on top. |
| The front steps are supplied loose as optional additions that are intended to be glued below the running plate. I decided to make new assemblies in nickel silver that I could screw (2 x 12BA) below the running plate, after painting and lining. |
 Replacement nickel silver front step assembly |
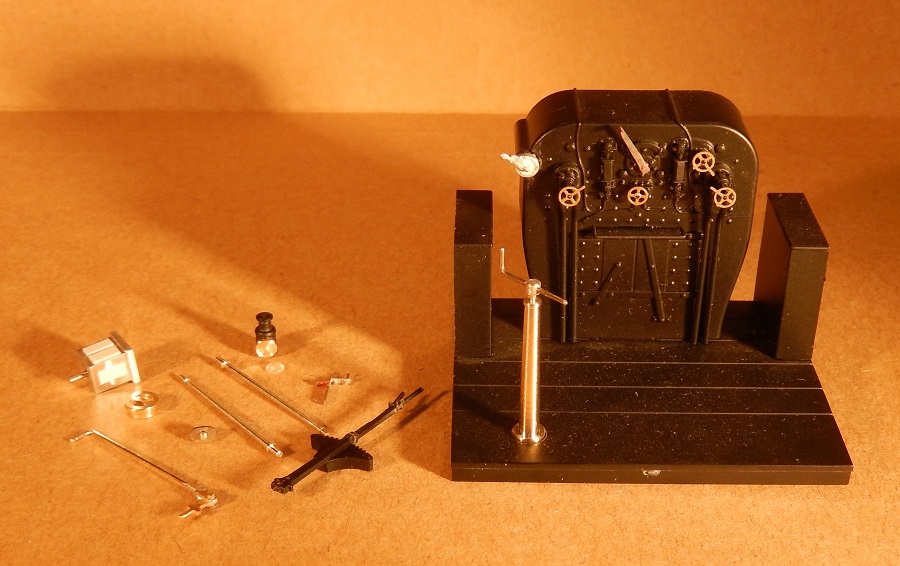 |
There were other smaller details that I elected to add or replace (samples shewn in the image below), including a lubricator (well, I think it is, difficult to tell from the photograph that I have) and a sand operating leaver that fit on the LHS within the frames towards the front, two boiler washout plugs for the firebox shoulders, four tapered handrail stanchions for the cab openings, two lamps (with lenses to be added after painting) and six lamp brackets that I silver soldered up from nickel silver strip. I turned the reversing lever around on the quadrant because the release catch should be behind the leaver, as the driver looks at it. Given that it is already quite detailed and that it is well hidden within the closed cab, the only modification that I made to the backhead was to fit a valve handle on the LHS where there was a peculiar looking, oval blanking off plate. These components will appear in their places on the loco in later images. |
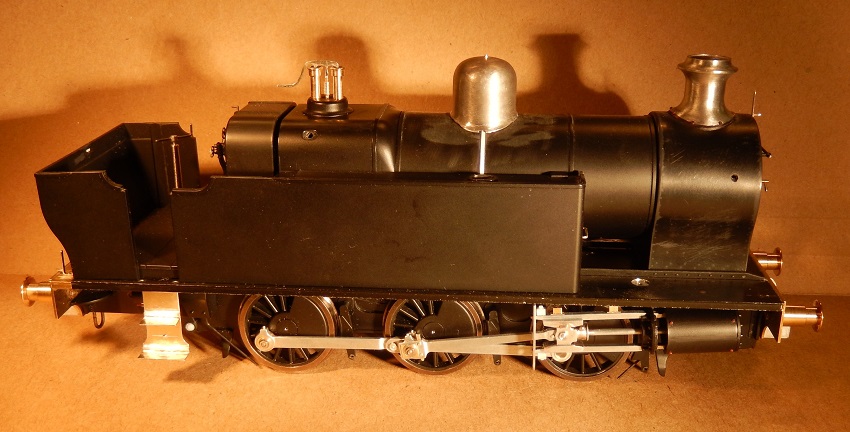
At this stage, I had ticked off all the tasks on my long list and the only remaining modification was to replace the upper part of the cab but, before that, here is Victory with all the redundant parts (except the upper part of the cab) removed and most of my mods and additions in place. All that remains to be done is to remove the upper part of the cab, which was a simple job with a slitting saw in the milling machine, and to fit a new one in brass.
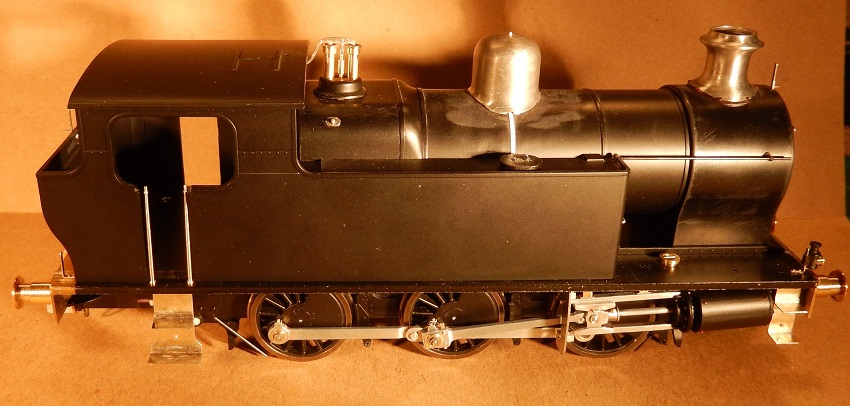
No going back now.
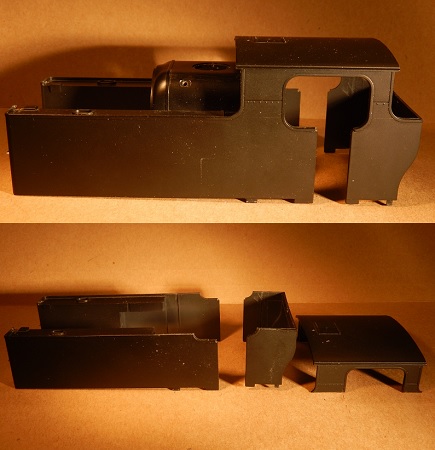 |
The tanks, cab and bunker moulding (upper) and with the upper part of the cab removed (lower). |
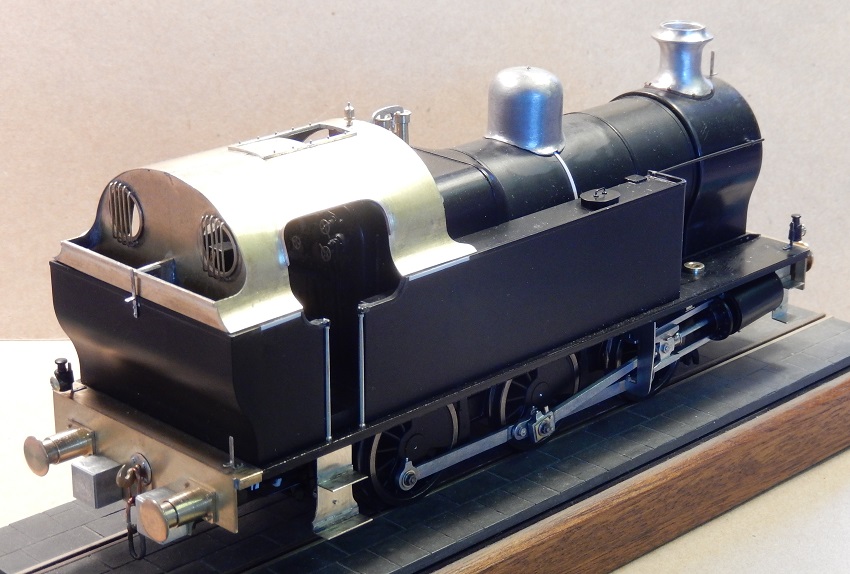
To measure up and fit the new upper part of the cab, I need to reassemble the major parts of the loco to create a KS Victory Cabriolet:
| I made dimensioned sketches of the new front and rear cab sheets by referring to a drawing of a Hunslet Austerity with a Lambton cab and also with the aid of a cab etching of the same loco that was given to me by a friend who had built his Austerity with a conventional cab. Devising the dimensions of the two side sheets was a matter of fitting to the existing tanks and bunker, and referring to the photographs. |
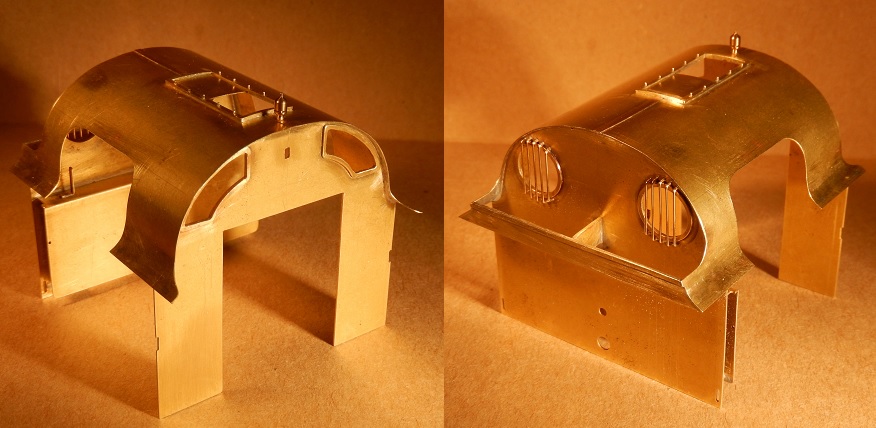
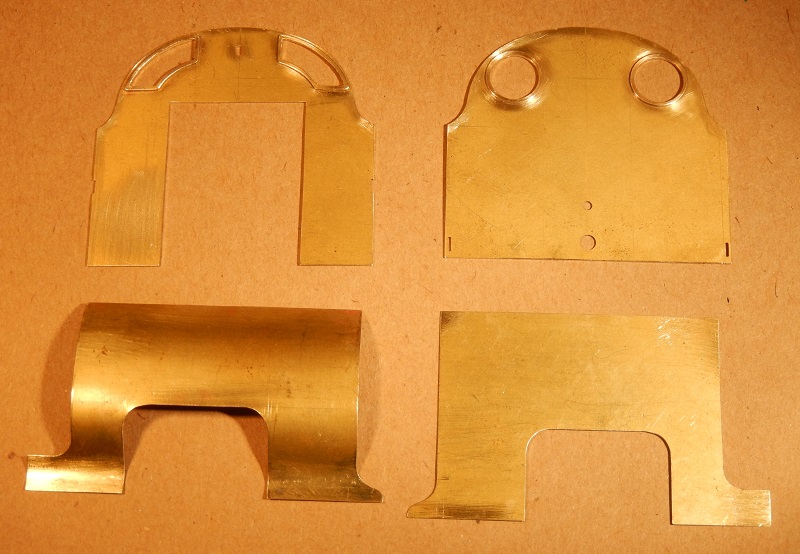 Components of the Lambton cab, one side sheet has been formed (lower left) |
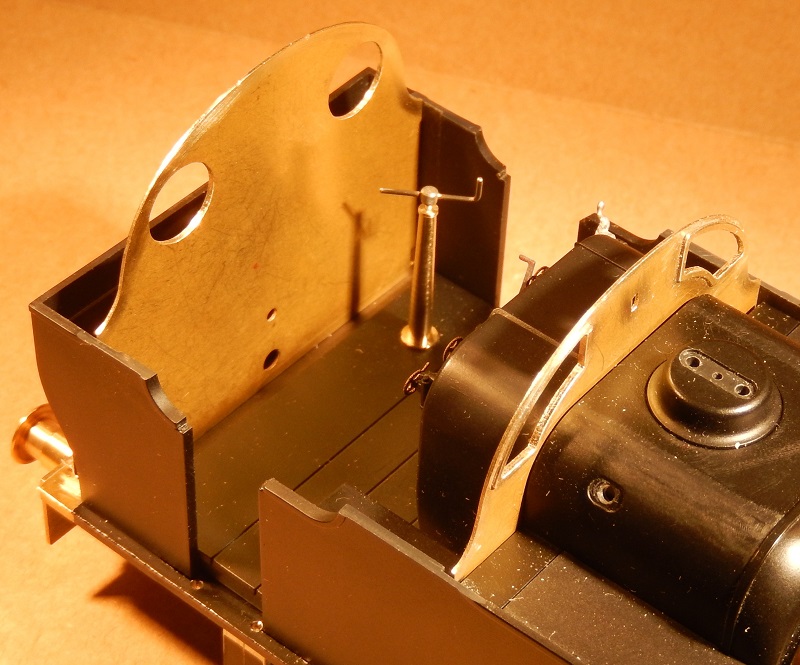 |
The front and rear cab sheets fit neatly in place. |
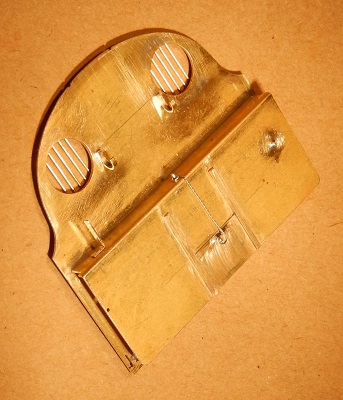
| There were two more tasks to undertake before soldering together the four elements of the cab: fit the bars to protect the glass in the rear windows (right) and make up the internal bunker, coal door and a few fittings (below). |
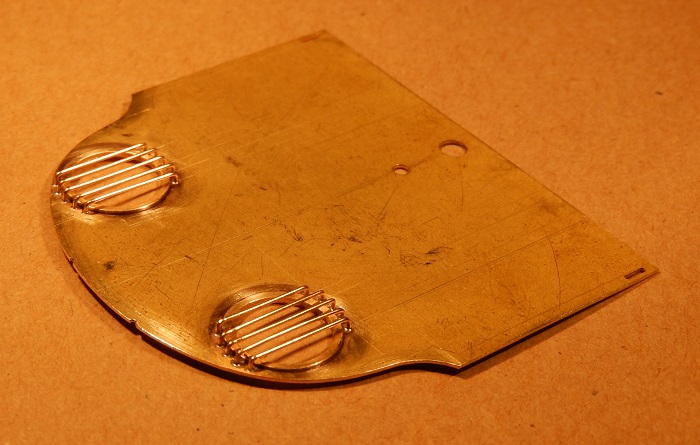 I had hoped to drill the holes for the bars using coordinates and my milling machine but, in the end, I found that marking out very carefully and drilling in stages up to 0.45mm to take the brass wire was likely to be the most successful way. |
 |
 |
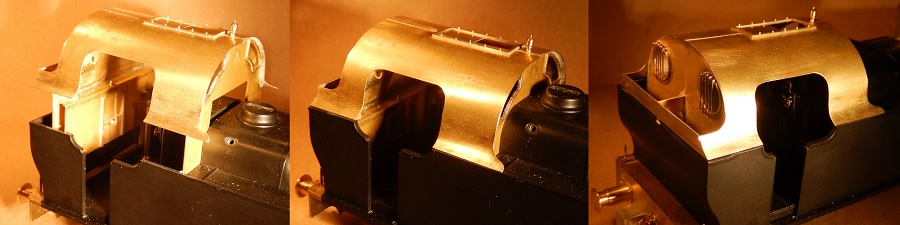
With the front and rear cab sheets slid into place in the grooves in
the tanks and the bunker, respectively, I tacked on the left and right
side sheets using my RSU. I carefully removed the assembly to finish the
job with a conventional iron. I finished off the assembly with a rear bunker extension and a ventilator in the roof. |
As was planned (and hoped) the assembly slid back into place on the bunker and tanks and … ta-da … a Victory with a rather different looking cab.
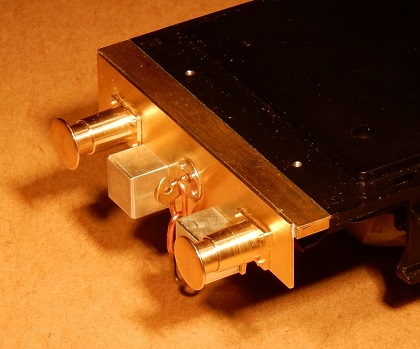
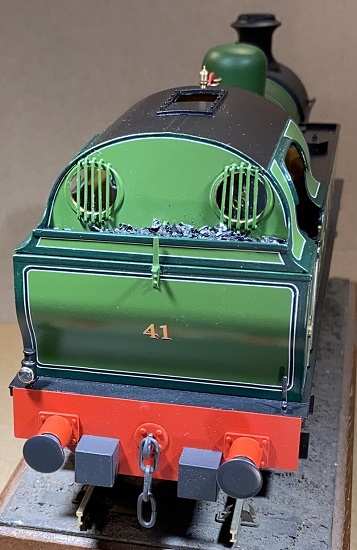
With last of the tasks ticked off from my list, No. 41 went off to the paint shop. However, before that, I put in place nearly all the loose bits that will not be permanently attached until after painting and took these two photographs for the record.
All went well spraying the many component parts in the paint shop but, although I have tackled involved lining before (eg Humber), I came unstuck on the first tricky part here: lining the cab, bunker and tanks. In the event, my good friend Paul Moore, who paints and lines professionally, kindly offered to take on the job for me. My original plan had been that, having completed the lining, I would add the lettering by modifying commercial transfers, altering the outlines slightly and touching in. Paul elected to take the same route but has made a far, far better job of it than I ever would; thank you, Paul!
 |
 |